
DNS
After Create site the wizard moves to DNS. The site now has a first party hostname, jiezrq.example.com in the
screenshots, and this step decides where the snippet loads from: your own hostname, or a URL the Blotout platform
serves for you.
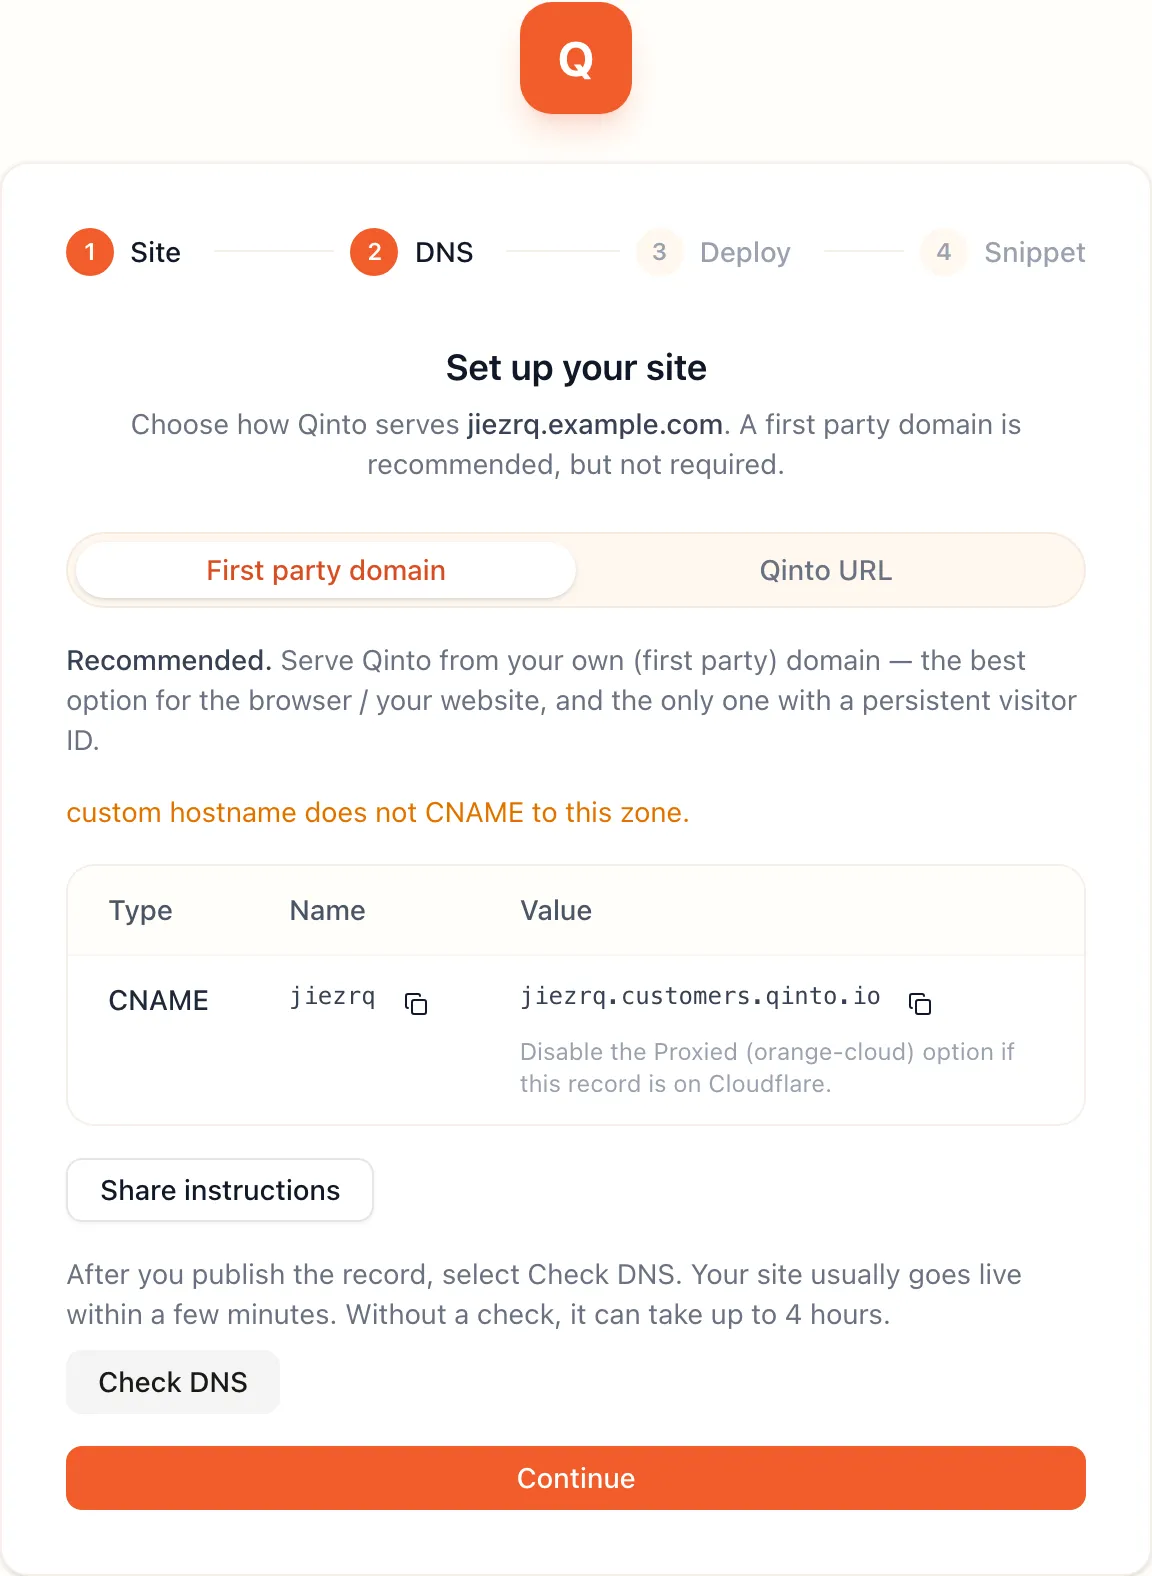
The two choices are a toggle at the top. The switch only goes one way: a site on the Qinto URL moves to the first party domain under Settings → DNS once the hostname verifies, but a deployed site cannot move back to the Qinto URL. To return to it you delete the site and set it up again.
Qinto URL
Section titled “Qinto URL”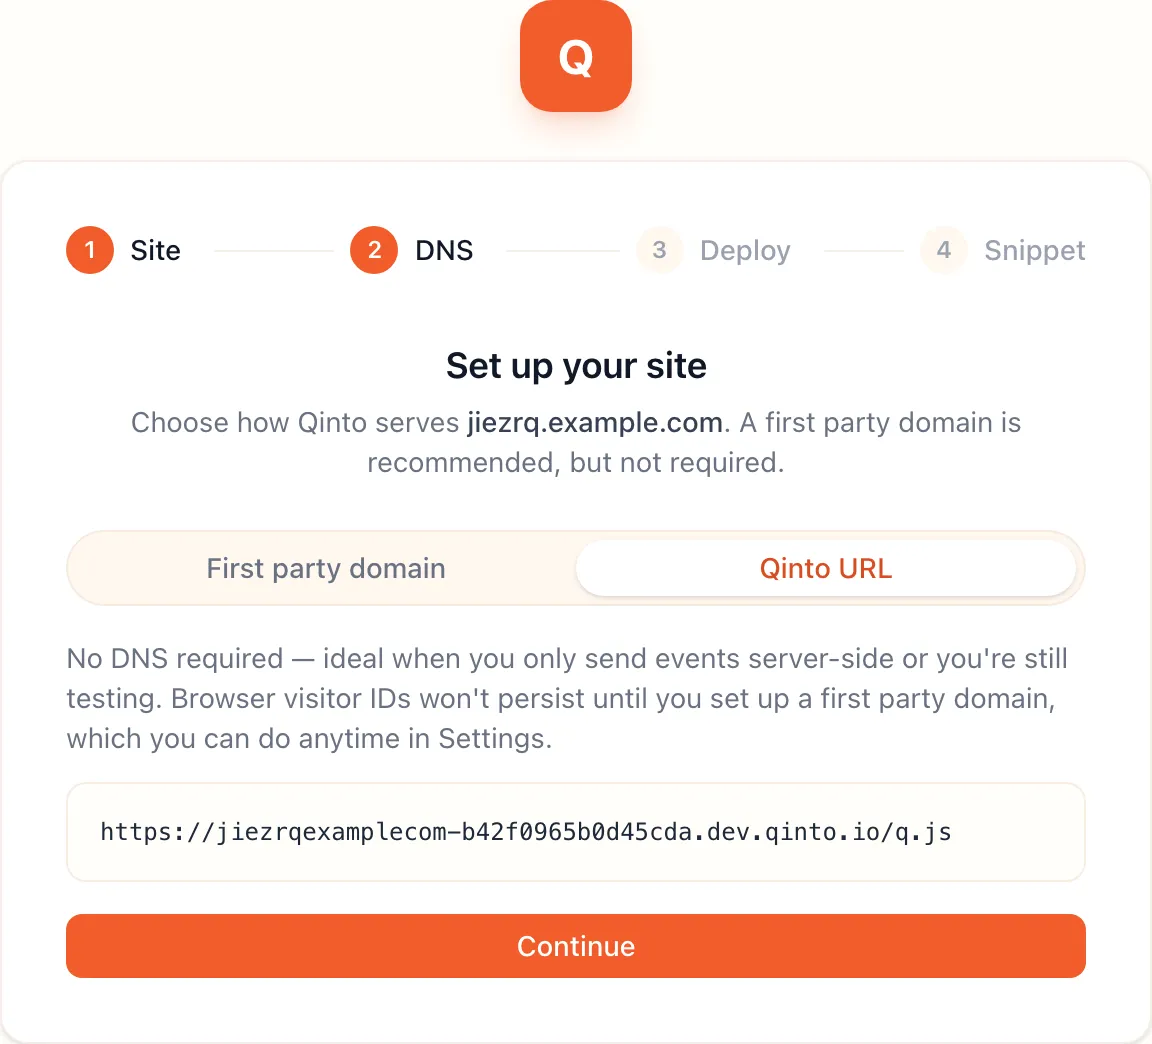
Qinto URL needs no DNS change. The platform serves the site at a hostname of its own, such as
https://jiezrqexamplecom-b42f0965b0d45cda.dev.qinto.io, from the moment the deploy finishes. Use it while you
build: a staging site, a local page with the snippet pasted in, a server integration you want to test before the
DNS team is involved.
Do not go live on your website with it. The visitor cookie belongs to the Qinto hostname, not to yours, so browsers treat it as a third party cookie. Safari and every private window drop it between visits, and a returning visitor becomes a new one. The ID graph still works for the server side, which names visitors by identifier and needs no cookie.
First party domain
Section titled “First party domain”First party domain serves the site at your first party hostname. The cookie is then set on example.com,
browsers keep it, and a visitor who comes back next week is the same visitor. This is the setting for a live
website, and the only one with a persistent visitor id in the browser.
To activate it, add one record in the DNS of your root domain:
| Type | Name | Value |
|---|---|---|
| CNAME | jiezrq |
jiezrq.customers.qinto.io |
The name is the label alone, because most DNS providers append the root for you. The value points at a target the platform runs, where it answers for your hostname with a certificate it issues for it. On a self-hosted site the target is under your own zone.
Share instructions emails the record to the people who run your DNS, up to ten addresses at a time.
Add the record at your provider
Section titled “Add the record at your provider”The steps for the common providers. In every one, the name is the label alone, the value is the target from the table, and the type is CNAME. Leave the TTL at its default.
- In the Cloudflare dashboard select the domain, then DNS → Records.
- Select Add record.
- Set Type to CNAME, Name to
jiezrqand Target tojiezrq.customers.qinto.io. - Switch Proxy status off, so it shows DNS only with a grey cloud.
- Select Save.
- In My Products find the domain and select DNS.
- Select Add New Record.
- Set Type to CNAME, Name to
jiezrqand Value tojiezrq.customers.qinto.io. - Select Save.
- In Domain List select Manage next to the domain, then the Advanced DNS tab.
- Under Host Records select Add New Record.
- Set the type to CNAME Record, Host to
jiezrqand Value tojiezrq.customers.qinto.io. - Select the green check mark to save.
- In Domains select the domain, then DNS → DNS settings.
- Under Custom records select Add record.
- Set Host to
jiezrq, Type to CNAME and Data tojiezrq.customers.qinto.io. - Select Save. A domain that moved from Google Domains is managed here.
- In the AWS console open Route 53 → Hosted zones and select the domain’s zone.
- Select Create record.
- Set Record name to
jiezrq, Record type to CNAME and Value tojiezrq.customers.qinto.io. - Select Create records.
- In the Shopify admin open Settings → Domains and select the domain.
- Select Domain settings → Edit DNS settings.
- Select Add custom record → CNAME record.
- Set Name to
jiezrqand Points to tojiezrq.customers.qinto.io, then Confirm. This applies to a domain Shopify manages. A domain bought elsewhere is edited at that registrar.
Use your own label and target from the table on the DNS step. The ones above belong to the example site.
Verify it
Section titled “Verify it”Once the record is published, select Check DNS. The platform asks Cloudflare to look the hostname up again, and when the CNAME is in place the amber line turns into “Your site is verified”. That usually takes a few minutes after the record goes live. Without a check, Cloudflare retries on its own and the site goes live within four hours.
A hostname that is still unverified shows the reason in amber, most often “custom hostname does not CNAME to this zone.” Check the name, check the proxy status, and wait for your provider’s propagation time before you check again.
You do not have to wait for DNS to propagate to finish onboarding. Check once, and if the record is not visible yet, select Continue and carry on. The same check is under Settings → DNS, so you can come back later, once your provider has published the record, and verify it there.
Continuing with First party domain before the hostname verifies gives you a snippet on a hostname that does not answer yet, and nothing switches on its own when DNS lands. If you want to collect events today, select Qinto URL before Continue, add the record in the meantime, and move the site to the first party domain under Settings → DNS once it verifies. After that switch, Settings → Capturing data shows both snippets, so pages that still carry the Qinto URL tag keep working while you swap them.
No record needed
Section titled “No record needed”A self-hosted site whose root domain is the host’s own Cloudflare zone needs no record at all. The platform attaches the worker to the hostname inside the zone and the step says “Your site is verified — no DNS changes needed.”