
Hosting
The Hosting toggle on the Site step decides which Cloudflare account runs your site’s edge worker and holds its data. The choice is per site and is fixed once the site exists.
| Managed | Self-hosted | |
|---|---|---|
| Runs in | Blotout’s Cloudflare account | Your Cloudflare account |
| You need | Nothing beyond this form | A Cloudflare account and an API token |
| Cloudflare usage is billed to | Blotout, inside your Blotout plan | You, on your own Cloudflare bill |
| Visitor data is stored in | Blotout’s account | Your account |
| Qinto URL for testing | Yes | Yes, on your workers.dev subdomain |
Managed
Section titled “Managed”Managed hosting is the default. The platform deploys the site into Blotout’s Cloudflare account, so you do not need to worry about it. Every site shares one hardened deployment, and Blotout runs it.
Blotout is SOC 2 and HIPAA compliant, and the managed deployment is inside that scope. The reports, policies and subprocessor list are at trust.blotout.io. Pick managed hosting when you want the compliance posture without running infrastructure, or when your team has no Cloudflare account.
Self-hosted
Section titled “Self-hosted”Self-hosted puts the site’s worker and its data in your own Cloudflare account. You see the Workers, Durable Objects and storage in your dashboard, you pay Cloudflare for them, and the data never leaves your account.
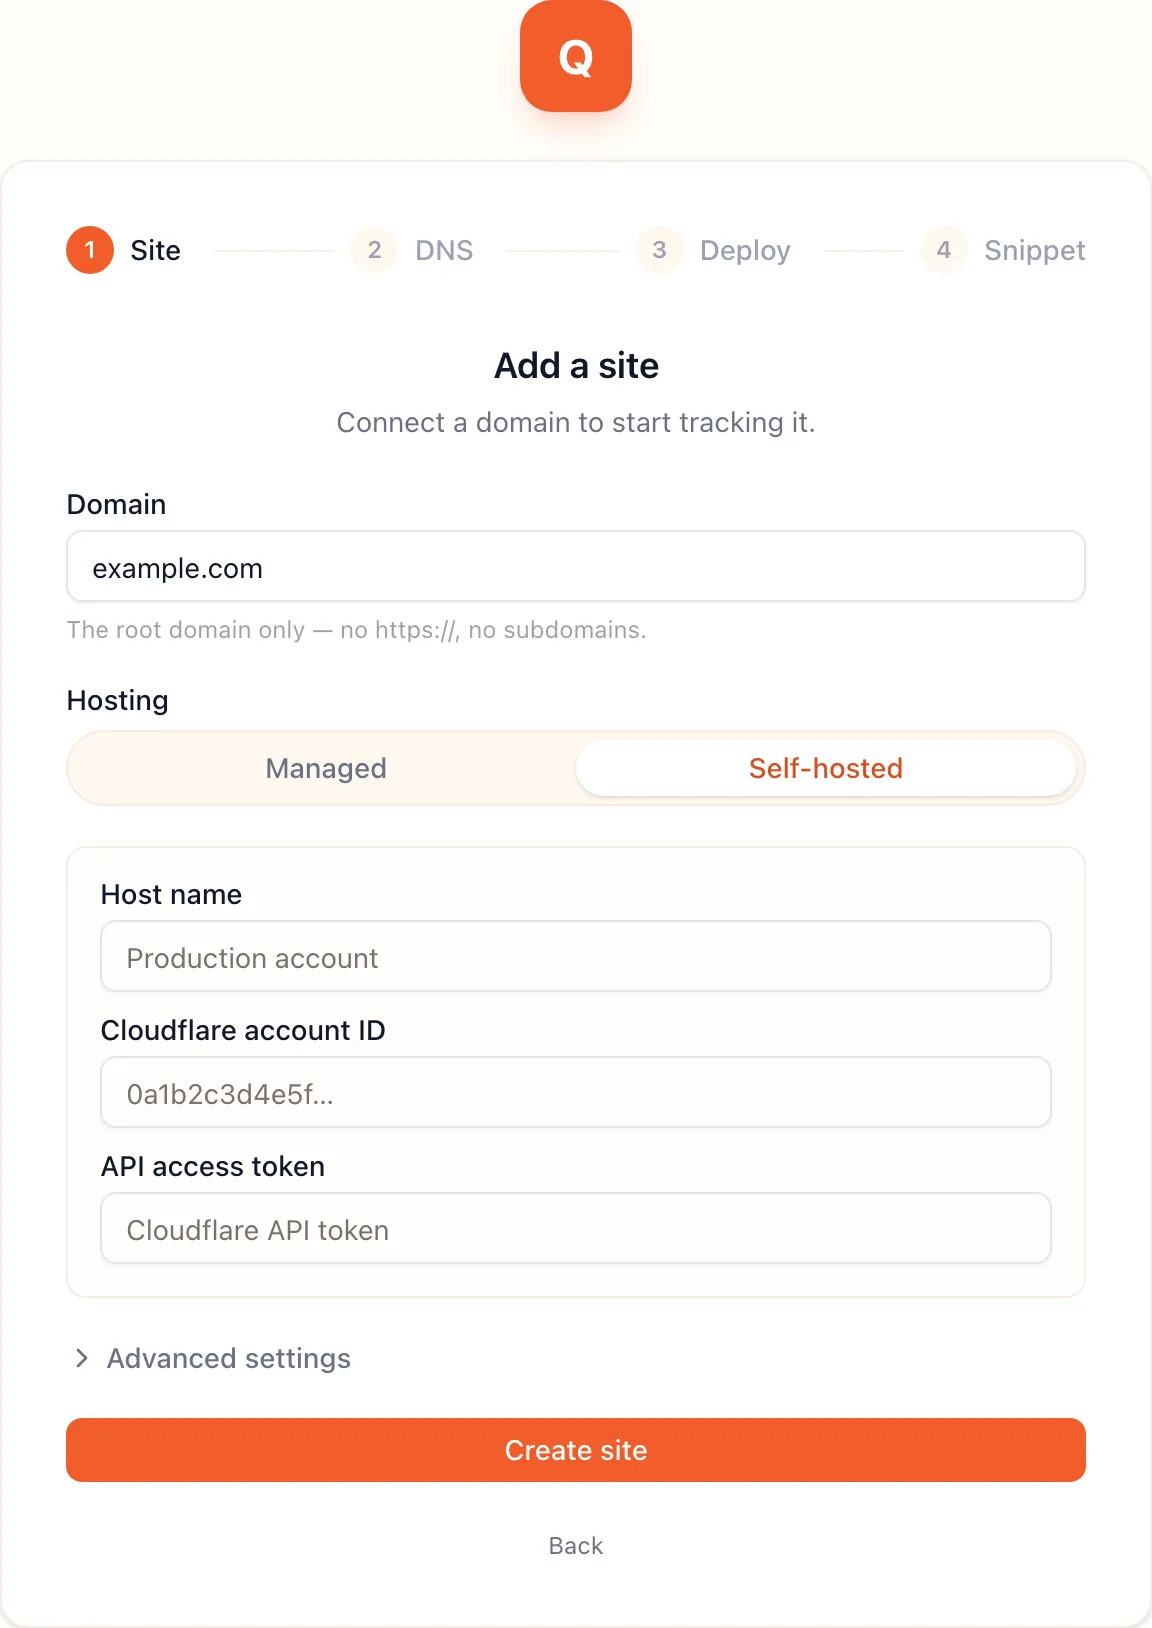
Selecting Self-hosted opens the host fields. A host is a connected Cloudflare account. The first time, you create one inline. After that, the form offers the hosts the team already has, and Add a new host for another account.
| Field | What to enter |
|---|---|
| Host name | A label for the account, such as Production account. It must be unique in the team. |
| Cloudflare account ID | The 32-character id on the right of any zone’s Overview page in the Cloudflare dashboard, or under Manage account → Account home. |
| API access token | An account API token you create for the platform. How to make one is below. The platform stores it encrypted and never shows it again. |
Create the API token
Section titled “Create the API token”Create an account API token, not a user API token. An account token belongs to the Cloudflare account, so it keeps working when the person who made it leaves, and its API rate limit is the account’s own instead of being shared with everything else that person does in Cloudflare.
- In the Cloudflare dashboard open the account, then Manage Account → Account API Tokens, and select Create Token.
- Under Token name, replace the generated name with one you will recognise, such as
Blotout. - Under Permission policies, choose Start from scratch and add the permissions in the table below.
- Under Account resources, keep the account the token belongs to.
- Under Zone resources, include the zone the platform will serve from. One zone is enough for most teams.
- Under Token expiration, keep No expiration. A token that expires takes every site on the host offline.
- Leave Client IP address filtering empty. The platform calls Cloudflare from Cloudflare’s own network.
- Select Review token, then Create token, and paste the value into the form.
| Scope | Permission | Used for |
|---|---|---|
| Account | Account Settings: Read | Checking that the token reaches the account |
| Account | Workers Scripts: Edit | The site worker, its Durable Objects, secrets and tail consumers |
| Account | Workers KV Storage: Edit | Key-value namespaces an installed app declares |
| Account | D1: Edit | Databases an installed app declares |
| Account | Workers R2 Storage: Edit | Buckets an installed app declares |
| Account | Workers Pipelines: Edit | Streams and sinks an installed app declares |
| Account | Hyperdrive: Edit | Hyperdrive configs an installed app declares |
| Account | Vectorize: Edit | Indexes an installed app declares |
| Account | Workflows: Edit | Workflows an installed app declares |
| Account | Account Analytics: Read | The site’s analytics pages and its usage records |
| Account | Tag Management: Edit | Tagging every object with the site it belongs to, so cleanup finds it |
| Zone | Zone: Read | Listing the zones the host can serve from |
| Zone | DNS: Edit | The CNAME target the first party record points at |
| Zone | SSL and Certificates: Edit | The custom hostname and its certificate |
| Zone | Workers Routes: Edit | Routing the first party hostname to the worker |
The app permissions matter only once you install an app that declares that resource. A token without them still creates and deploys the site, and the install fails with a Cloudflare permission error that names the product.
What the platform checks
Section titled “What the platform checks”When you select Create site, the platform verifies the token before it writes anything. It must be active, it must read the account id you entered, and it must list the account’s zones. Each failure comes back as an error on the form, and nothing is saved until all three pass.
If the account has exactly one zone, the platform picks it. If it has several, or none, the site is not created yet. Open Team → Hosts, choose the zone on the host’s page, and run the wizard again.
If the site’s root domain is the zone you included, nothing else is needed: the platform attaches the worker to the first party hostname inside the zone. If the root domain is a different one, such as a client’s site served from your agency’s zone, the zone needs Cloudflare for SaaS enabled under SSL/TLS → Custom Hostnames in the Cloudflare dashboard, because the first party hostname becomes a custom hostname on it. The platform writes the fallback origin and the CNAME target that hostname needs when it creates the first such site. See DNS for what the customer adds in each case.